Test Reports
Default Report
XTC will automatically create a report from the results downloaded at the end of the load test. You can find the generated report in the Reports section on the Results tab, where it will be available as compressed archive ready for download if you need it on your local machine.
All generated reports will be available inside XTC to browse and evaluate them, and XTC can also generate a link for public sharing.
📝Metadata Added by XTC
The Test Comment section of XLT load test reports is automatically enriched with data from XTC. This includes:
- The name and the description of the load test the report was created for.
- Metadata such as organization and project short name, the number of the load test and the result the report is based on, and the number of the report itself.
- An additional report comment that can be entered when creating a custom report.
In case you don’t want to expose this data in the report, you can create a custom report without this data. Simply uncheck the Include XTC Metadata option in the New Load Test Report dialog.
Intermediate Reports
While the test is still running you can also generate intermediate reports by clicking Generate Intermediate Report on top of the load test contents.
You will be prompted to select which result artifacts should be downloaded. The Intermediate Report will always be created for the complete runtime of the test up to the point of report creation, including the ramp up. Clicking Accept will start the report creation (which may take several minutes).

Prompt for creating an intermediate test report
Only one intermediate report can be created at a time. The trigger button is disabled whenever another intermediate report is in progress.
Creating an intermediate report also generates an intermediate test result which can be used to create a custom intermediate report using settings other than the defaults.
Custom Reports
After the load test has finished, you can create as many custom reports with adjusted report settings as you need.
This can be done on the Results tab, either by opening the context menu of any result set and selecting Create Report, or by clicking the NEW button at the top of the Reports section. In the latter case, the report will be created from the latest available result. When determining the latest result, XTC skips pending or failed results as these typically don’t have result data attached (yet).

Ways to create a custom test report
The NEW button is enabled only if there are indeed valid load test results available to create a report from. Empty results don’t count as valid and will be ignored.
On creating a custom report, there will be a popup to configure the report settings: you will be prompted to enter a label and description for the report, and may choose a time range to create the report for (intermediate and final reports always cover the fulfilled testing time). The default time range is always the complete test duration, but you may determine the start time and end time by several options, similar to the report creation in XLT. To check whether your settings are correct, the effective report time range will be displayed at the end of this section:
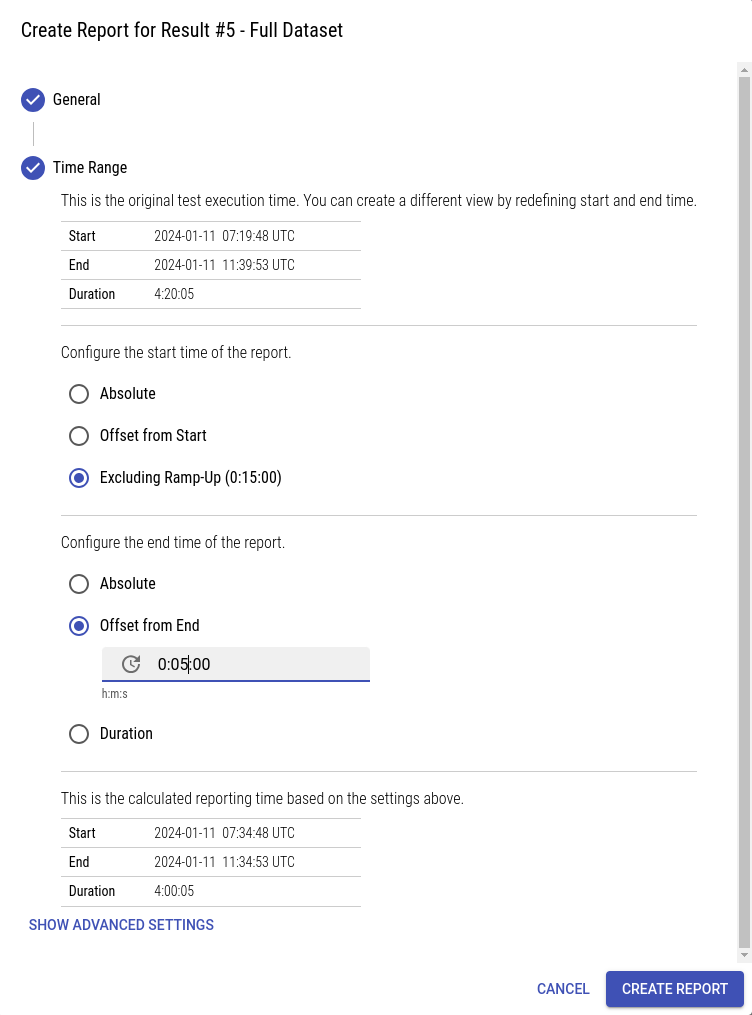
Basic settings for creating a new load test report: adjusting the time range.
By clicking Show Advanced Settings five more sections will appear:
- in Merge Rules you can override the project’s merge rules (to avoid unexpected side effects we recommend to paste your complete set of merge rules here, even the ones that may have been already defined in the project),
- in Agent Includes/Excludes you can define include and exclude patterns for agents,
- in Test Scenario Includes/Excludes those for test cases,
- in Report Generator Properties you can define completely a custom report configuration, and
- in Misc Settings you currently have the option to specify the time zone to be used, e.g. “CET” or “EDT” (this affects all time values shown in the report, especially in the charts - if no time zone is given, XTC will use UTC by default).
These advanced settings are not trivial, so make sure you know what you’re doing.
On clicking Accept report creation will be started (this may take several minutes depending on the result size). The report will appear in the list of reports, showing a little progress icon left to its name. After the report creation has finished, you will be able to click the name to open and read it. When creating a load test report fails, for example, because of an invalid custom command-line option, the report will be marked as failed.
To give you a quicker overview, XTC enables you to already open reports while their creation is still in progress (as soon as all report html pages and the charts on the overview page are available). You will notice the different icon next to the report name in the reports overview:

Topmost report is still incomplete and currently being uploaded
Checking Report Settings
The options used for creating a custom load test report are stored by XTC, and you can review them later on. Just open the context menu of the custom report in question and choose Show settings:
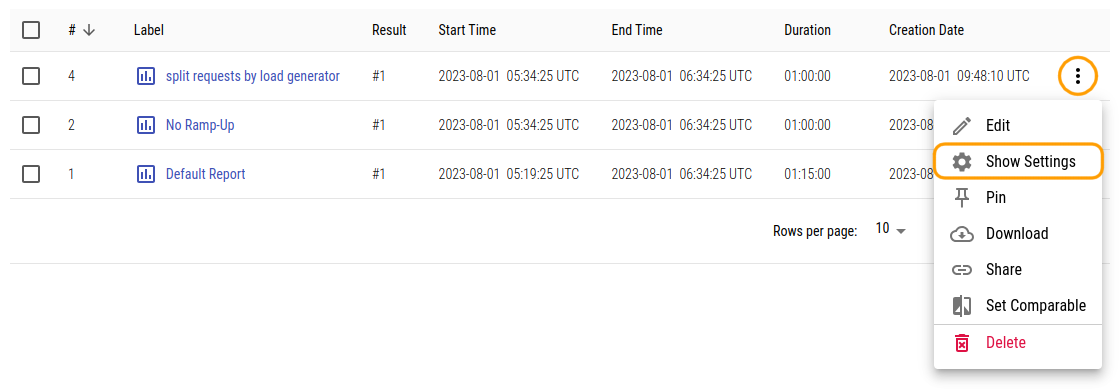
Show settings used for creating for a custom test report.
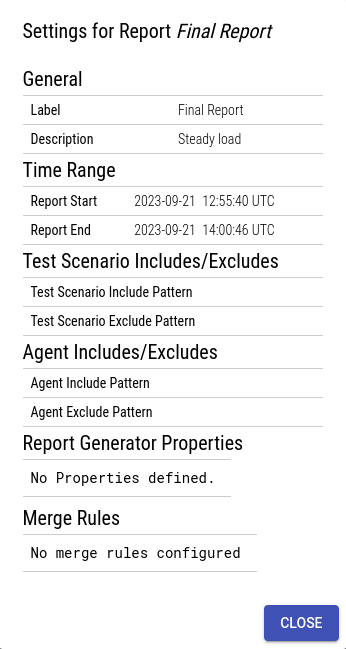
Settings from an example report
Comparison Reports
Improving the performance of a Web application is an iterative process. Typically, changes to the application will be followed by load tests to prove the changes had the desired effect. However, manually comparing the reports of two load test runs to spot the differences can be a tedious task. To this end, XLT provides Comparison Reports, which use color-coding to highlight the differences. Such comparison reports can now be created right from XTC.
Since comparison reports are the result of comparing two independent load test runs, such reports don’t belong to a certain load test, but live in a separate space in your load testing project: see the Comparison menu item in the navigation to the left.
This page shows two tabs: Reports and Comparison Reports. On the Reports tab, all reports of load test runs that have been selected for comparison are listed - to make a report available in this list, go to the load test report and click the Set Comparable context menu item. The report can be deselected again from this context menu, but it can also be removed using the context menu on the Reports tab of the Comparison page.

To make a report available for creating comparison reports, click Set Comparable in the context menu in the load test reports list.
To create a comparison report, select the two source reports and click the button Compare above the table. The report for the older load test automatically becomes the baseline report. If you want to swap the baseline and measurement run reports, check the Reverse Order checkbox in the Create Comparison Report dialog. Name the report, provide a description as needed, and submit the dialog. After a short while, the new comparison report will be available on the Comparison Reports tab. Click the link to view the report.

Select two reports from the list and click Compare to create a new comparison report.

The Create Comparison Report dialog.
Just like regular load test reports, comparison reports can be renamed, deleted, downloaded as an archive, and also shared publicly.
Sharing a Report
XTC simplifies sharing your reports with XTC users as well as people outside the organization.
If your role within the load test project is at least that of a reviewer, you may view all information about a load test, including every report that was created for any test run. If you are a project administrator, you can add XTC users as reviewers to the project if you want them to have access to all reports.
To share reports with people outside XTC, you can create a Sharing Link for each report. By clicking Share in the context menu of the report to be shared in the reports tab, a prompt will open and you may select whether to use the default sharing settings or define an expiration time specifically for this report link. The maximum lifetime of shares is limited to 180 days.

Creating a public sharing link
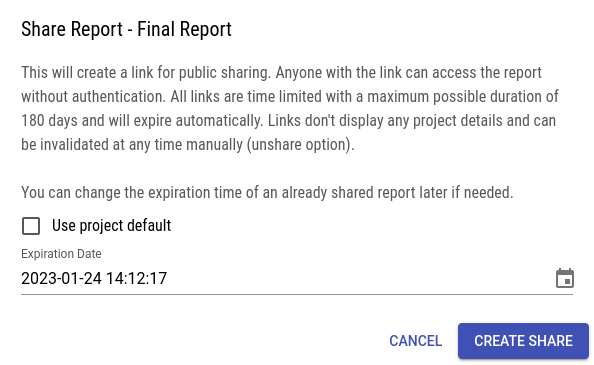
Creating a sharing link not using the default expiration settings
Clicking Create Share will create a link for public sharing, which will be displayed below the report link as Shared Link. Anyone with the link can access the report without authentication. All links are time limited and will expire automatically. Links don’t display any project details and can be invalidated at any time manually by the unshare option (in the context menu of the shared report).
The sharing link is different from the report link (the report link does not become public by sharing), so please make sure to copy the right one of them, as only the sharing link is publicly accessible.
You can change the expiration time of an already shared report later if needed, by either updating the project’s default sharing settings (which will update expiration times for all reports shared by using this default), or by clicking Edit Share in the report’s popup menu and selecting a new expiration date. The link won’t be changed by this, just its lifetime. If you want to invalidate a shared link, select the Unshare option instead. To remove all custom shared links at once, use the option to delete existing custom share links in the project’s sharing settings.
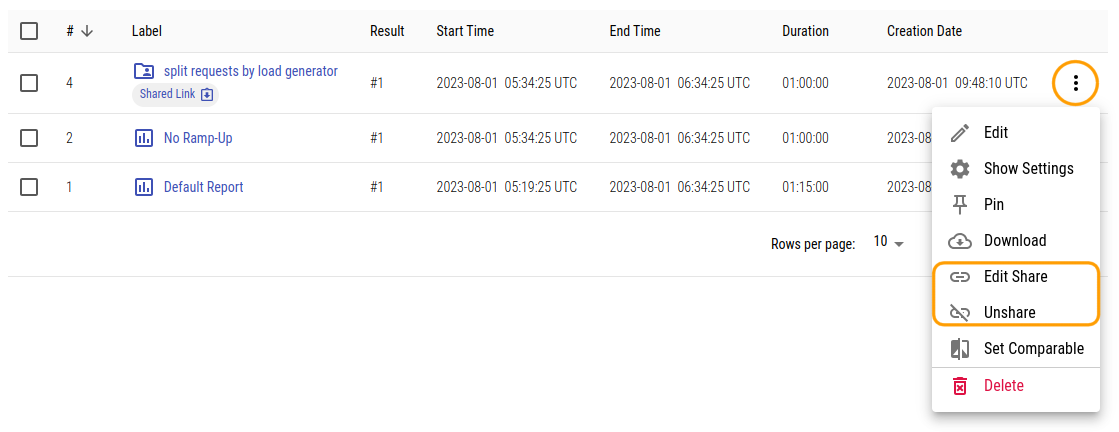
Editing the expiration time of a public sharing link or unsharing
Downloading Reports
To download a report to your local machine, click Download in the report’s context menu. You will get a .tar.gz archive containing the complete load test report including all the result browsers that the report links to.
Even if a load test report can already be viewed, the corresponding report archive might not be available for download yet. The related context menu item is disabled until the report archive is uploaded completely.
Deleting a Report
Finally, if you don’t need a generated report any longer, you may want to delete it to save storage space. To do this, just click Delete in the report’s context menu. You will be prompted to confirm that you really want to delete the report.
In case you accidentally deleted some test report, XTC allows you to restore it within 30 days after deletion. Click the Show Deleted Items entry in the 3-dot reports table menu to list the items that can be restored. To restore a particular item, click Undo Deletion in the context menu of that item. To switch the view back to the live items, click Hide Deleted Items in the table menu. Please note that load test reports that were publicly shared must be re-shared after restoring.
Restoring an Automatically Retired Report
XTC stores load test reports and performance comparison reports in two forms:
- As a folder containing HTML pages, chart images, and supporting files. In this unpacked form, the report is ready for you to browse.
- As a single archive file containing all of the above files. This form is used when you download the report to your local hard drive.
XTC automatically retires reports 180 days after creation to save storage space. This means that the report is marked as retired and all unpacked report files are deleted. Consequently, the report can no longer be viewed.
If you need to view a retired report again, you must first restore the unpacked report files from the report archive. To do this, the corresponding project must be active. Open the context menu of the report and click Extract Archived Report. After a few minutes, the unpacked report is available and can be viewed for another 180 days.
Errors on Report Creation
Creating a load test report may fail for several reasons, for example because of invalid report generator settings in your test suite. The Error link next to a failed report will open the console log of the report generator. This way you should get an idea what the actual reason for that failure was.