Starting and Stopping
Starting the Load Test
Instead of manually starting your load tests, XTC can also schedule tests to start automatically at a certain time.
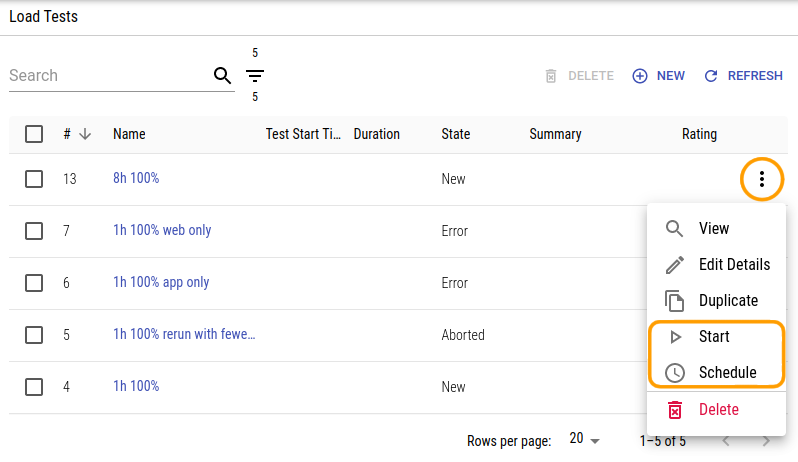
To actually start the load test, click the Start context menu item in the load test table or the Start button on the load test details page:
You will be prompted to confirm that you want to start the load test with the given settings now. If you click Start Load Test XTC will start the load test by
- downloading the current state of the test suite project from the repository
- building the project (in case a technical error occurred when building the load test suite, the whole build process, including any preparative steps, is being retried),
- provisioning the requested agents and, if this was successful,
- run the provided test scenarios for the configured time.
Scheduling a Load Test
Instead of starting the load test manually you can schedule it for an automated start. If you use this feature, make sure you have all settings properly configured. The scheduling does not validate the setup. You can remove a schedule at any time or start the test manually if desired.
To create, update or delete a test schedule, click the Schedule context menu item in the load test table or the Schedule button on the load test details page to open the scheduling dialog, then pick a date and time (UTC).
Once a load test has been scheduled, its settings can no longer be edited. If you want to change anything, you’ll first need to delete the schedule using the scheduling dialog, make the required changes, and afterward schedule the load test once again.
Stopping a Load Test
XTC simplifies finishing load tests for you, as load tests will be stopped automatically after the run is complete. XTC will take care to deprovision the agents that were used for the test run and it will automatically download results and create a report.
Please note that only Google Machines provisioned by XTC itself will be deprovisioned automatically after the test is finished. You will need to shut down any Custom Machines you added yourself.
If XTC fails to terminate an agent machine, it will mark the Terminate Agents step on the Status tab of the load test as failed.
Aborting a Load Test
However there might be several reasons why you’d want to abort a load test before it has finished: maybe you noticed too late that you missed some configuration setting, or you notice a lot of unexpected errors popping up on the scenario overview or your app server is already collapsing halfway through the run, to just name a few. In these situations, you can just abort the test run by clicking Abort Load Test on the top right.
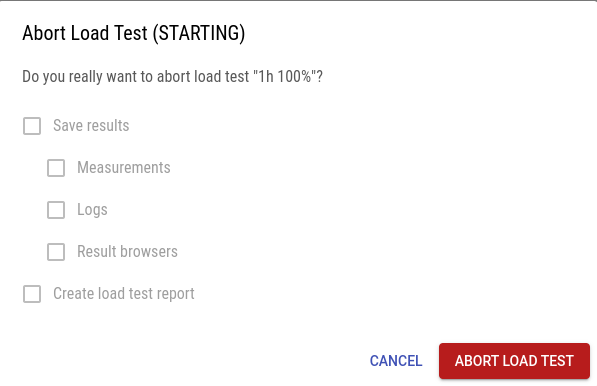
This will open a popup which prompts you to confirm that you want to abort the current run. Depending on the test status (whether any test scenarios have run already, thus producing result data) you may select which result artifacts should be downloaded and whether a report should be created. By deselecting unneeded artifacts, result browsers for example, the initial download may progress much faster and, consequently, storing the result and load test report to persistent storage later on may take less time as well.
XTC will then stop the running test scenarios and deprovision all agents.
Right after a user has clicked the Abort Load Test button, the button will be disabled for the current user as well as for all other users. This is to indicate that the abort procedure is in progress.
Please note that only Google Machines provisioned by XTC itself will be deprovisioned automatically after the test is aborted. You will need to shut down any Custom Machines you added yourself.
If XTC fails to terminate an agent machine, it will mark the Terminate Agents step on the Status tab of the load test as failed.


